
When you receive your plans its important to understand them so you can ensure everything you want is included and hasnt been missed out. If its not on the plans or at least in your tender then it wont be done. Even if its in an email this likely wont be sufficient.
As I havent done my kitchen it wont cover off these checks until I go through this around Feb 23.
A great way to compare plans
I asked my builder for the .dwg files so I could compare them against my plans and I could overlay them over each other. That way I could go through everything in great detail and it was clear what wasnt right. If you cant get these you can trace the pdf. You can do this in something like floorplanner.com with your original plans and then when you receive the updated ones you can replace the pdf that you traced with the latest one.
Building Size
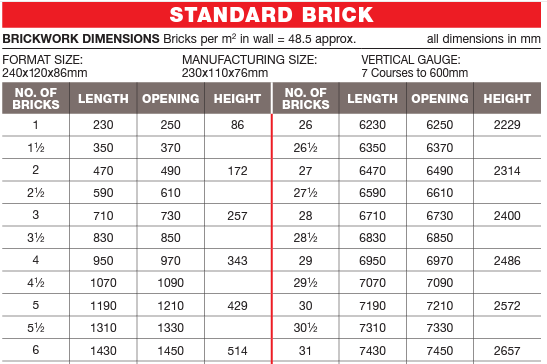
If you are building a custom home its possible that the overall dimensions of the house don’t line up with the brick courses used by builders. Its easier and more efficient for bricklayers to lay either a full brick which is 230mm wide + 10mm mortar and half a brick being 120mm (incl. mortar). The overall building dimensions will likely be adjusted to comply with these standards.
In the chart below 6 bricks in length is 1430 wide and has a height of 514mm. The opening is used for window and door sizes. You will notice window manufacturers will have standard window sizes that match the opening sizes in the chart which also corresponds to the brick courses. An an example a 04-06ASW will mean the following
- 04 = 429mm height which is rounded to 430 by window manufacturers. This is 5 brick courses high.
- 06 = 610mm which is 21/2 bricks wide
Internals
Room Dimensions
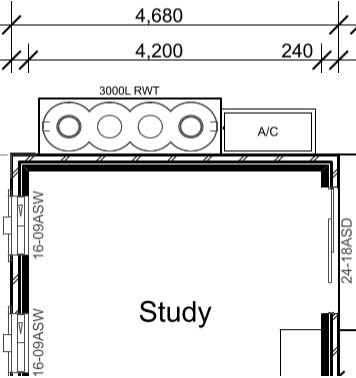
Sometimes there are changes you want from the draftsman which doesnt work and it requires a room to change dimensions to achieve this. It should be obvious that if you want to extend one room you have to take from another but there can be cascading issues as a result. Check the dimensions provided.
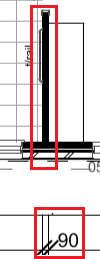
You can see the lines here show the outside of the room is 4680mm but the inner dimensions are 4200mm which account for 240mm walls. Some builders also use 90mm internal walls instead of 70mm and vice versa.
Windows
Dimensions
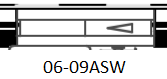
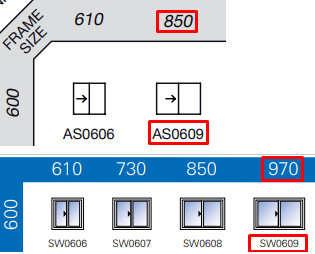
On your plans you will see codes for the windows. Over here you can read 06-09 as 600 high by either 850 (Wideline) or 970 (Stegbar) wide, depending on the window manufacturer. ASW = Aluminium Sliding Window. Note that there is no standard numbering use by all window manufacturers. Check the window schedule or the elevations for the exact sizes.
Head Heights
Are the windows all the same head height and are these high enough. If you have raised your ceiling heights check these still look right. To save costs some builders ensure the head heights are to the eaves, that way they dont have to use a lintel and extra bricks above it.
Sometimes the elevations might hide some windows so if you want the head heights to be different to the others you want to explicitly have this on the plans.

Window Position and Type Examples

Window/Door Position
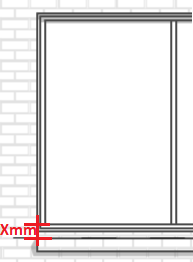
Check the position of the window to ensure its centered or located where you want it. You can trace the pdf in an app and then check the distances. It wont be accurate without the .dwg file but its the next best thing. Ideally you will have dimension lines showing its position otherwise assume it will be interpreted differently by the installer.
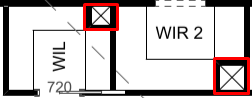
Window Type
In the image on the left the window is 16-27ASW which means its a sliding window. Sometimes a certain type of window cant be used in a location and the builder or window supplier can change this. Go through each window to ensure its the type you want. More information on the types of windows can be found here: Windows
Window Sill
If you have windows that are meant to start from the floor check that they are as it can be easy to miss.
Window Opening Directions
Check which direction the window opens and think about how this will work when you are in the room ie. is there something in front of it that will make it hard to reach.
Skylights

The roof profile can force a different position to an ideal location and the builder might adjust your position on this. Check the location and size of the skylight.
Doors
Door Size, Type and Opening Directions

Check the width of the door, in this case its 720. The opening direction is important too so check that it doesnt interfere with anything when fully open eg. wardrobe.
Also check the type of door, is it a hinge door or a cavity one. More details about doors can be found here: Inclusions
For bedroom ensuites and wardrobes check that doors arent missing entirely. Sometimes a cavity door or barn door can make best use of the small space.
Wheelchair Access
You might not need a wheelchair now but what happens in a few years when an elderly parent comes to stay with you or yourself requires one. The doorway needs to be at least 850mm wide and theres a few other things to consider. If its important to you then look further into it. The new NCC 2022 Vol 2 requirements come into effect on May 2023 which require houses to be designed to be wheelchair accessible. NSW has not signed up to this.
Bathrooms
Some small items to look out for:
- Toilet roll holder position
- Tower rail position – Ideally close to the the shower but not always possible
Floor wastes
Firstly, check the floor waste has been included and then see if the location is where you want it and if it makes sense to have it there. For instance, if the shower leaks, will the waste be close by.
Shower Tap, Door & Head Location
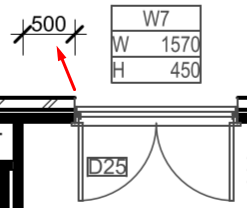
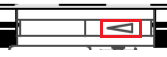
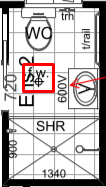
The shower entrance should be unobstructed and the shower head should be away from it normally. The red arrow shows how you enter the bathroom and the shower.
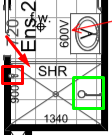
The shower tap is on the left in the red box. Its away from the shower head and might be a good idea if you have small kids and you dont want them to be hit with water when they turn it on. The shower head is in the green box.
Vanity Sizes

Check the size and how many sinks are included for your vanity. Here its 600 wide with a single sink.
Shower Niche
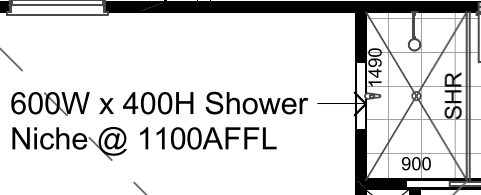
A niche can be a standard size which is around 600mm wide or it can be the full length of the wall. Check the size as well as how far off the ground it is (AFFL – Above finished floor level). The height should fit things like a large shampoo bottle.
Air Conditioning
If you have ducted aircon and you have a double storey home you will need to run the aircon ducts from the lower floor to the first floor somewhere. A good location can be in a corner of a wardrobe where it would be hard to store items there normally. Not 100% sure (TBC) but ducts can be 300mm in diameter but can be compressed a little to fit into a space. A good size to leave would be around 400mm on the outer side. Smaller returns might be possible but best to consult with your builder on this.
Coffered Ceiling Dimensions and position
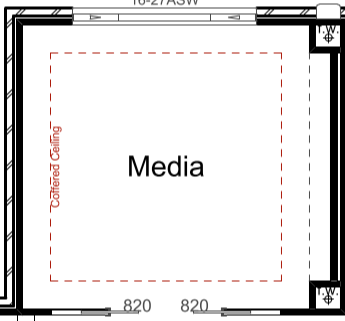
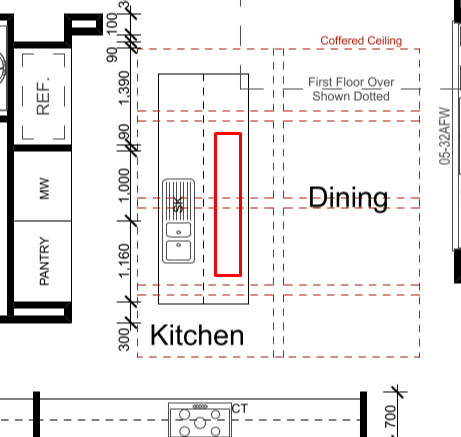
Think about the size of the coffered ceiling and the position from the walls. For the kitchen you may want pendant lights but the dimensions might not work as initially planned and may need some adjustments.
Think about the size of the coffered ceiling and the position from the walls. For the kitchen you may want pendant lights but the dimensions might not work as initially planned and may need some adjustments.
Bulkheads

Check the height of the bulkhead and if you may want to have a door installed there now or later.
Electrical
For tips on where to place lighting there are a various scenarios covered in: Lighting Tips and Ideas
Externals
Site Plan
Setbacks
Front setbacks are dependent if you’re going through CDC or DA. This can be a few different things including the average of the setback between your neighbours on either side or a set distance from the front. Dont assume the builder is correct, when I tendered with a few different builders almost all of them had very different setbacks and after comparing which were going through DA/CDC.
Side setbacks are also set through CDC or DA. You may want to maximise this and extend the home to make the most of it. Check that the builder has the correct setback otherwise changing this down the line can cause a lot of knock on effects to your layout.
Retaining Walls
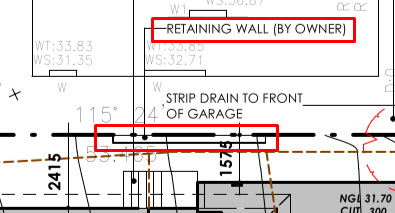
Retaining walls should be shown on the plans and will give you an indication of what you may need to do yourself. If its above a certain height you may need an engineered wall.
Floor Levels
These are the elevation numbers which come from the survey and when they site the house they will take this into account in terms of how high or low they place the slab.
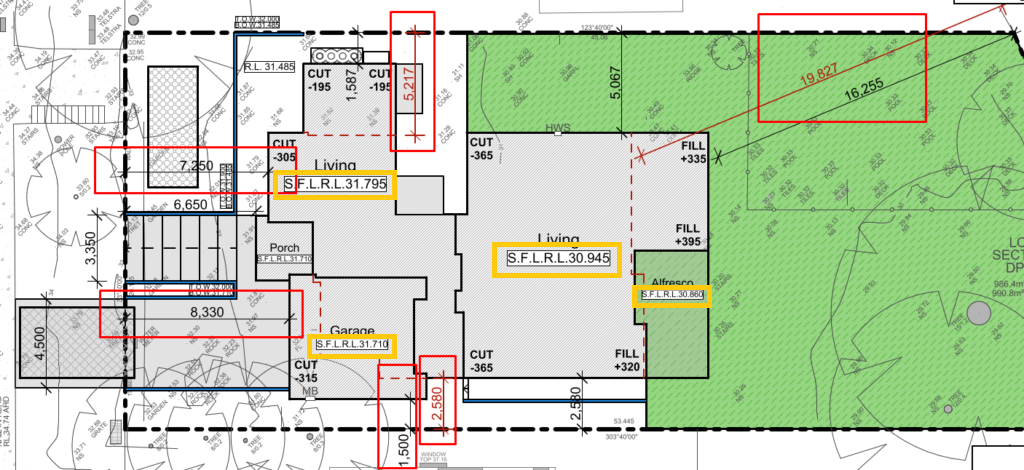
In the image above you can see the left Living has a finished floor level of 31.795 and right Living is 30.945. This means there is a step down of 850 and there would be steps in the house as a result. This property has a fall away from the of over 1m on the build site. You have different options to consider:
- Have a ground floor that has no steps. This would require larger Drop Edge Beams and steps from your Alfresco to the outside.
- Have a split in the ground floor which means a smaller Drop Edge Beam (lower costs), higher ceilings and windows (higher costs) and maybe one step from the Alfresco to the outside
The Porch, Garage and the Alfresco should be around 85mm lower than the living areas to protect against water coming into the house. In this case its 31.710 vs 31.795.
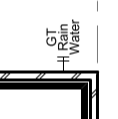
Rainwater Tank, Hot Water System, A/C Unit
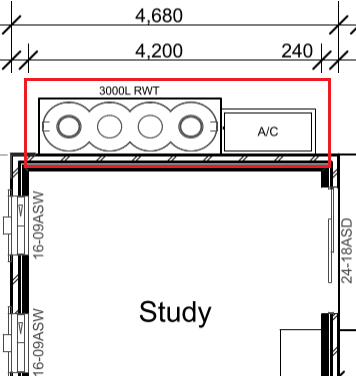
The rainwater tank, A/C unit and if you have an electric Hot Water System (HWS), will need sufficient space when placed around the house. Sometimes windows dont allow for the best locations, and for some people they have them placed right outside a window almost blocking it entirely. Keep this in mind when you are planning your windows. The builder will place this where its easy for them but not necessarily best for you. Ive seen it too where its in front of the alfresco where your back garden is.
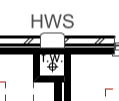
The HWS should ideally be placed as close to your taps and showers as possible to reduce the time it takes to get hot water.
Wall and Roof Materials
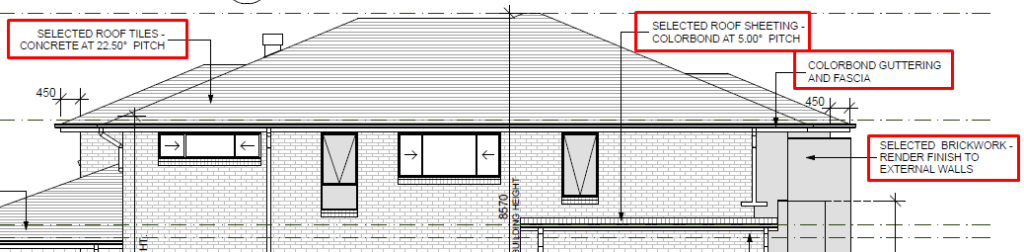
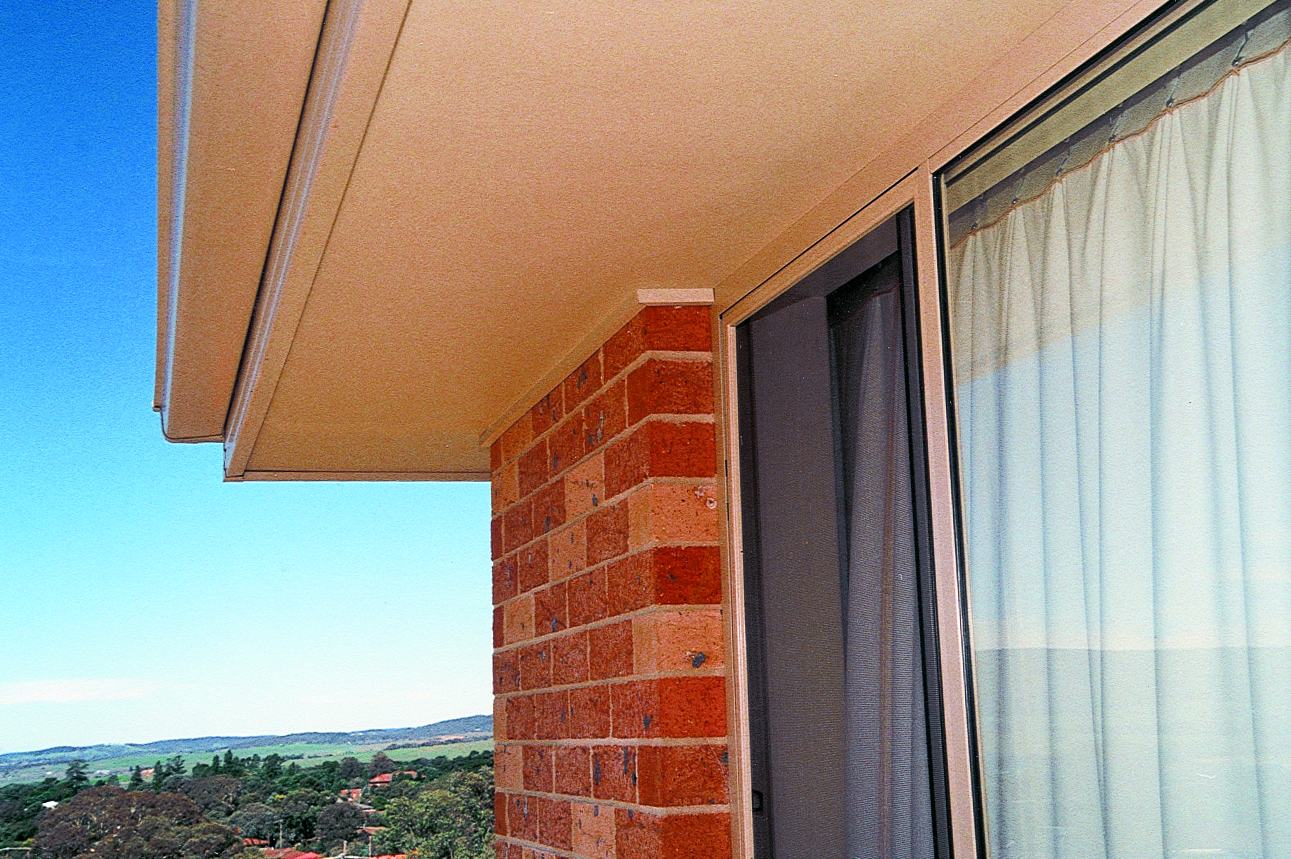
In the image you can see the following:
- Roof tiles are concrete ones
- The flat roof sheeting is colorbond and at a 5 degree pitch
- On the right it shows the brickwork has a render finish applied to it.
In some areas you may notice the type of lightweight material which could be weatherboard, Hebel or otherwise.
Downpipes
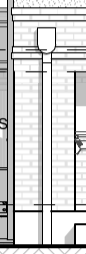
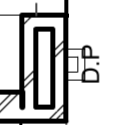
In some cases its not possible to change the location of a downpipe but you might be able to change it from one side of a corner to another. Speak to your builder about alternative locations.
Water & Gas Points
Check the location and number of water taps located around the house. Also check if its rain water or from the mains. For a garden you may want to use the water from your rainwater tank for things like an irrigation system.
Thanks! This is very helpful.